
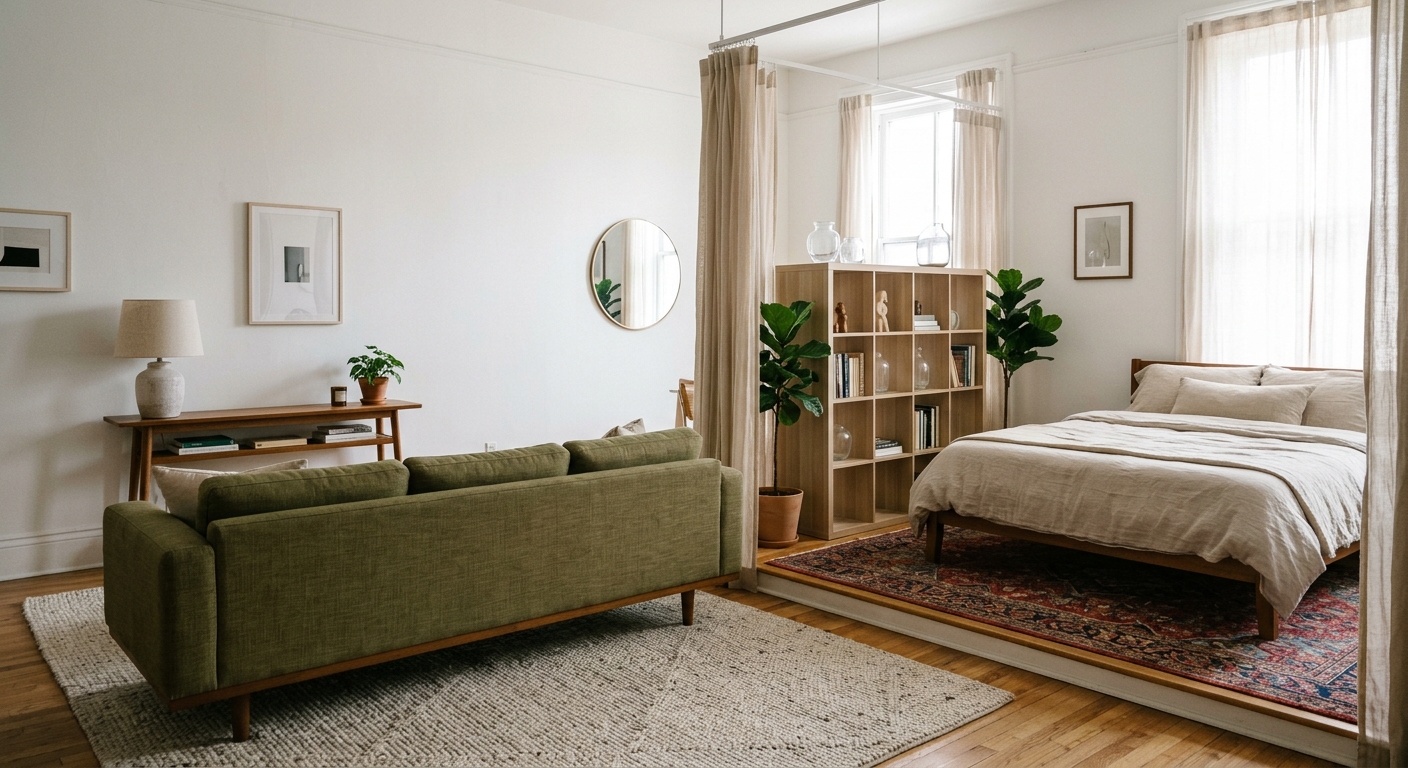
8 Zoning Tricks to Define Open-Concept Small Apartments Without Walls
Open-concept living is often advertised as the ultimate small-apartment layout—flooding your home with natural light and keeping the floor plan feeling expansive. But after a few weeks, the reality sets in: your bed is staring down your dining table, your home office is bleeding into your relaxation space, and your entire apartment feels like one chaotic, undivided room.
When you’re renting, building drywall or installing permanent partitions is completely off the table. But living in a visual “studio blur” doesn’t have to be your permanent reality.
The secret to mastering compact open-concept living isn’t about closing off your layout—it’s about zoning. By creating subtle visual and physical boundaries, you can define distinct “rooms” for sleeping, working, eating, and lounging without sacrificing an ounce of precious square footage or natural light.
Whether you’re styling a 400-square-foot studio or trying to carve out a dedicated home office in an open living room, here are 8 genius, renter-friendly zoning tricks to structure your small apartment—no contractor or damaged security deposit required.
Visual Boundaries & Flooring Anchors
When you don’t have drywall to define where one room ends and another begins, your floors and ceilings have to do the heavy lifting. The key to successful open-concept zoning is establishing visual “micro-zones” that guide the eye naturally through the space without interrupting the flow of movement.
Trick 1: Contrast Area Rug Placement
The fastest way to trick your brain into seeing separate rooms in a single open space is by anchoring each functional zone with its own distinct area rug. A rug acts as an invisible floor boundary, instantly grouping furniture together into a cohesive “island.”
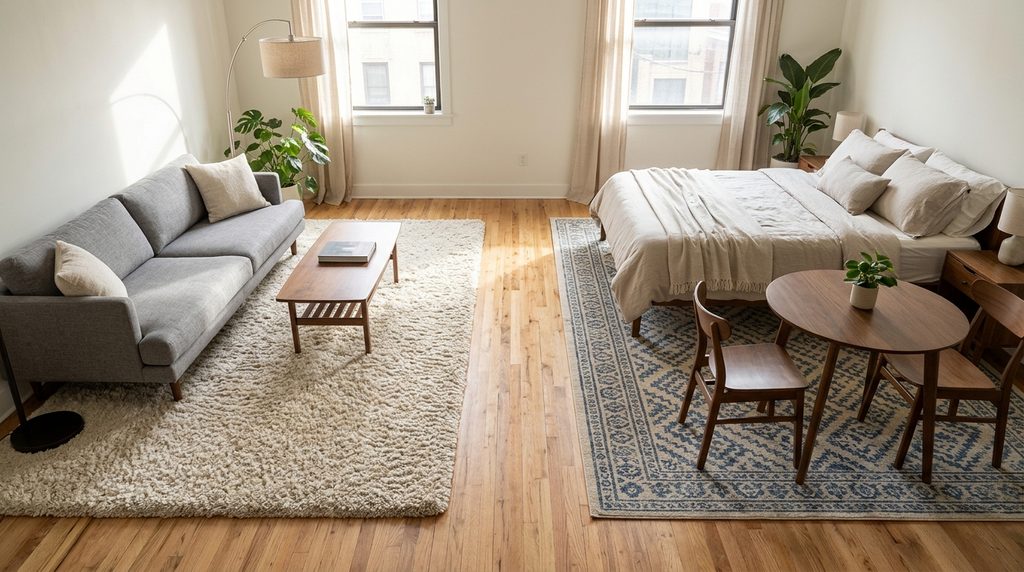
- The Two-Rug Strategy: Place a large, soft textured rug under your living room seating group, and a sleek flat-weave or low-pile rug under your dining setup or bed frame.
- Maintain the “Hallway” Gap: Leave at least 6 to 12 inches of bare floor between the edges of your rugs. This negative space creates clear visual walkways, preventing the room from looking cluttered.
- Pro Tip: Keep the color palette complementary so the two zones still talk to each other aesthetically, even while serving completely different functions.
Trick 2: Back-to-Back Furniture Layouts
Floating your sofa in the middle of the room rather than pushing it up against a wall is one of the most effective structural zoning moves available to renters.
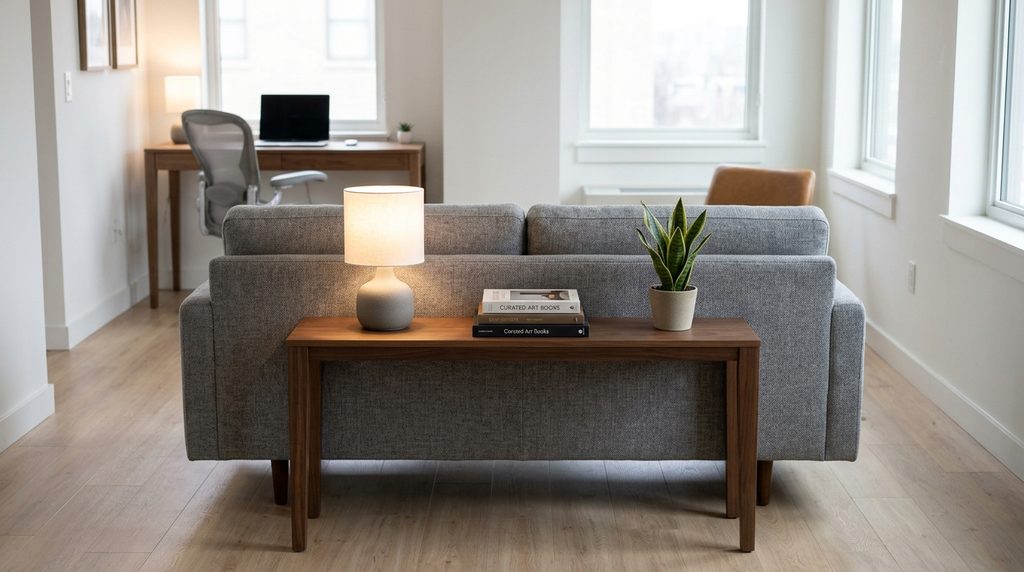
- Creating a Half-Wall: Position your sofa so its back faces your sleeping area, dining table, or home office desk. The solid back of the couch acts as a physical half-wall, blocking direct line-of-sight to the adjacent zone while keeping sightlines open across the top half of the room.
- The Console Table Trick: Place a low, narrow console table directly against the back of your sofa. Top it with a lamp, a couple of art books, or a small plant to add functional storage, conceal the back of the sofa, and soften the transition between your living room and sleeping or working zones.
Trick 3: Ceiling-Mounted Hanging Dividers & Curtains
If you want total privacy—like hiding an unmade bed when guests come over—without building a permanent wall, take your zoning to the ceiling.
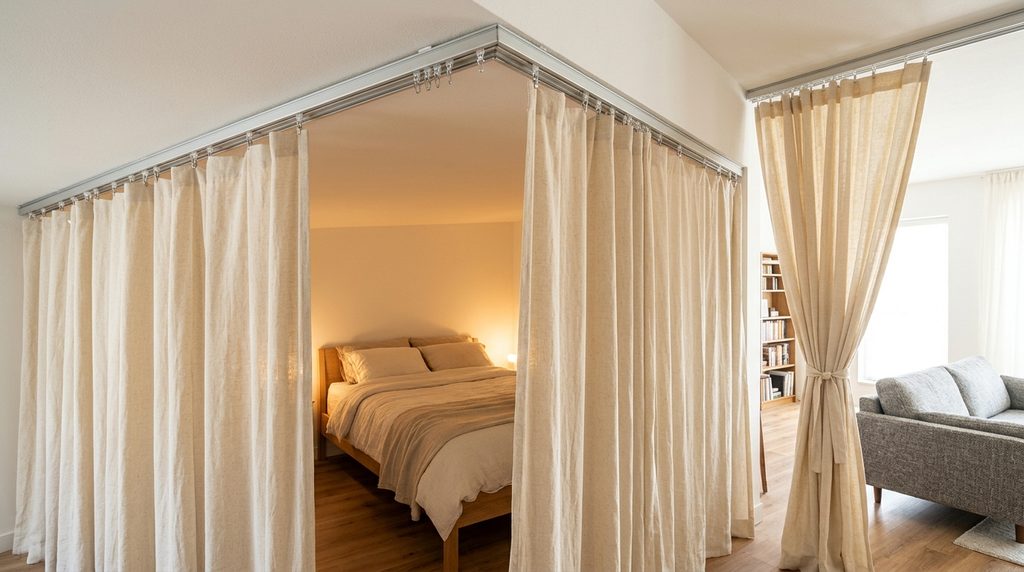
- No-Drill Curtain Tracks: Install lightweight tension-mounted curtain rods or ceiling-mounted peel-and-stick track systems along the border of your sleeping nook.
- Choose the Right Fabric: Hang semi-sheer or light linen curtain panels. When pulled closed, they create an elegant, cozy bedroom sanctuary; when pushed open, they tuck neatly against the wall to let maximum sunlight filter through the entire floor plan.
Architectural & Vertical Zoning
Adding vertical interest gives an open-concept apartment the illusion of built-in architecture. By drawing the eye upward, these tricks break up flat walls and establish clear functional boundaries.
Trick 4: Open-Back Bookcase Room Dividers
Solid room dividers block light and make small spaces feel boxy and claustrophobic. An open-back shelving unit (like an IKEA Kallax or a slim metal frame) gives you physical division while keeping the room feeling airy.
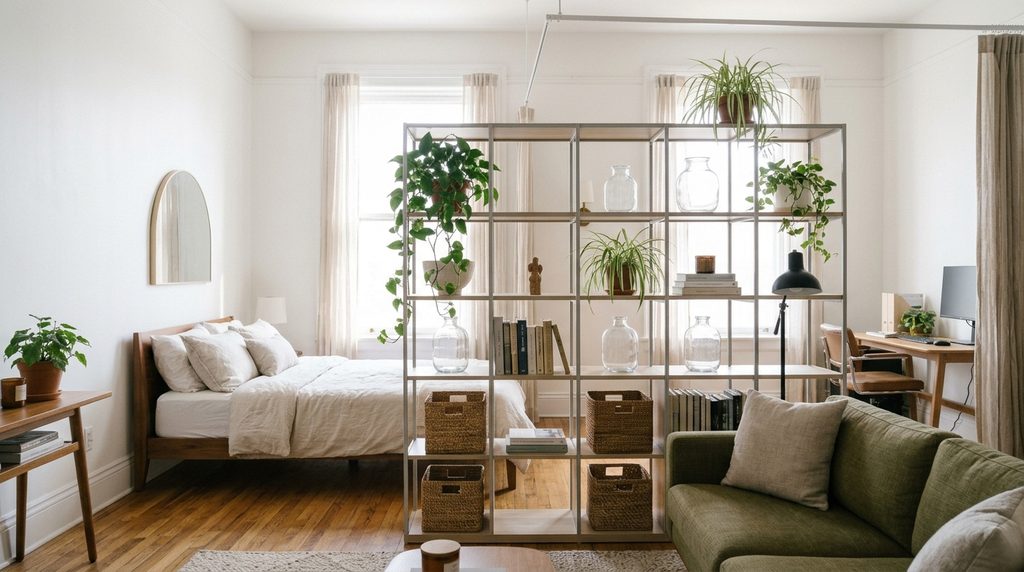
- Placement: Position the bookcase perpendicular to a long wall to separate your sleeping area or home office from the main living room.
- Styling for Light: Don’t stuff every shelf with books. Alternate between books, small plants, transparent glass vases, and woven baskets. This allows daylight to pass freely through the shelves while shielding direct sightlines to your private zones.
Trick 5: Strategic Ceiling Lighting Zones
Relying on a single central light fixture washes out an open floor plan and flattens your layout. Defining your zones with dedicated, layered lighting creates distinct visual “moods” for each area.
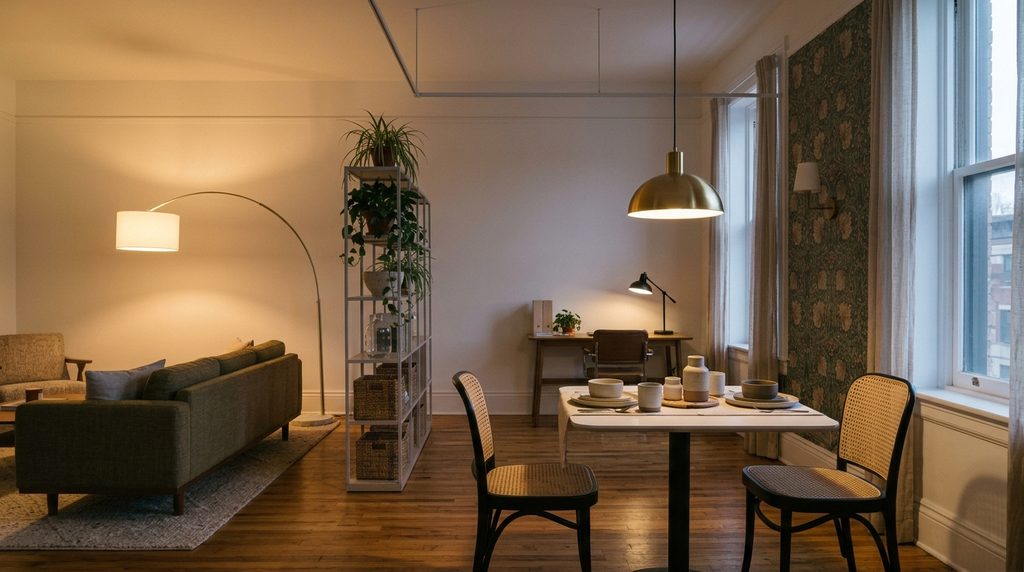
- Dedicated Fixtures: Hang a low-pendant light or plug-in chandelier directly over your dining table to lock in the dining zone. Pair it with a tall arc floor lamp over the living room seating area and a warm task lamp on your desk.
- Creating Evening Separation: When night falls, turn off the main overhead light and illuminate only the specific zone you are using. Lighting up just the living room corner while leaving the desk dark signals to your brain that the workday is officially over.
Trick 6: Vertical Paint & Peel-and-Stick Accent Block Zones
You don’t need to paint an entire room to define a space. Painting or wallpapering a precise vertical section of a wall creates a dedicated visual nook for a specific piece of furniture.
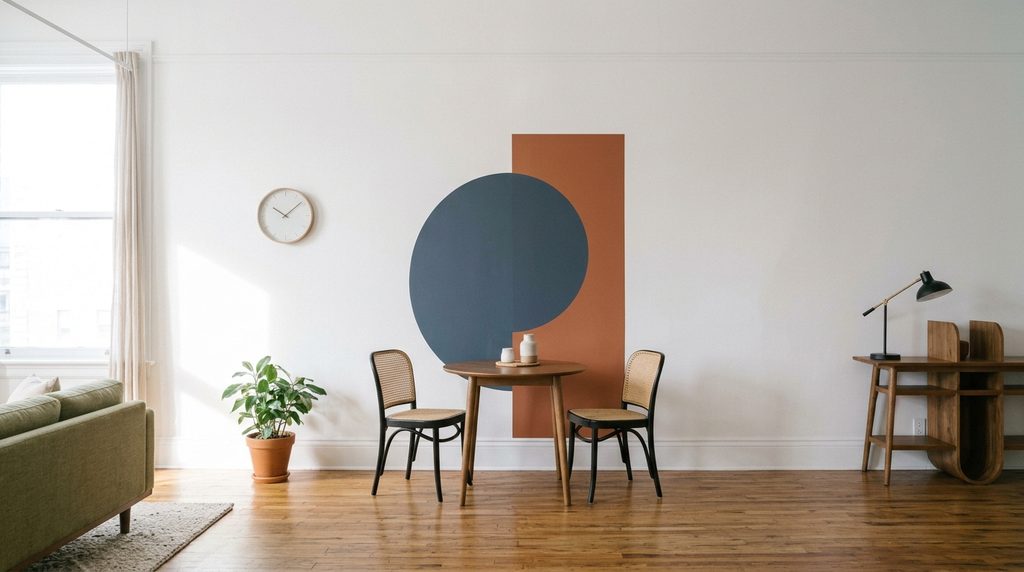
- The Arch or Block Method: Apply a peel-and-stick arch or geometric color block on the wall directly behind a small desk, dining bistro table, or headboard.
- Visual Anchor: The accent block frames the furniture within it, instantly turning a floating piece of furniture into an intentional, visually isolated functional zone.
Functional & Mobile Separators
For high-traffic areas or micro-studios where flexibility is essential, fixed furniture layouts aren’t always enough. Incorporating mobile and multi-functional separators lets you adapt your layout on the fly without locking yourself into a rigid floor plan.
Trick 7: Foldable Rattan & Fabric Partition Panels
Freestanding folding screens are the ultimate low-commitment zoning tool. Unlike permanent walls or heavy bookcases, a lightweight three-panel screen can be positioned in seconds to hide private areas and folded flat against a wall when not in use.
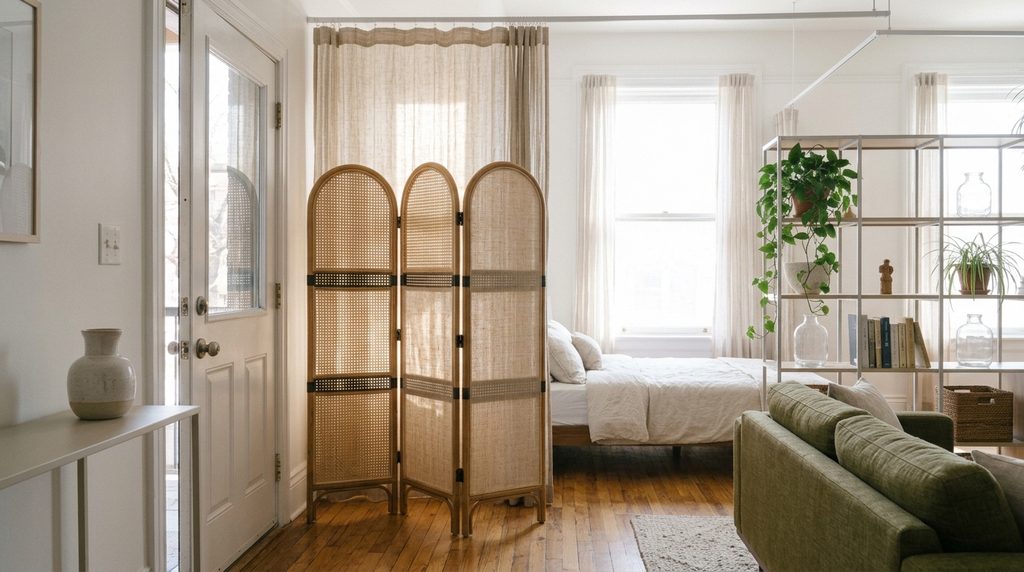
- Material Choice: Opt for natural materials like woven rattan, cane, or light linen screens over solid wood. Rattan and cane let ambient light filter through while still obscuring direct sightlines to an unmade bed or messy desk setup.
- Flexibility for Guests: Keep the screen tucked beside your wardrobe during the week, then unfold it perpendicular to your entry wall when hosting to block sightlines into your sleeping quarters right from the front door.
Trick 8: Kitchen Island & Bar-Height Console Boundaries
In modern open-concept apartments, the kitchen often spills right into the main living space without a dining room in between. Establishing a physical counter-height barrier isolates cooking mess from your relaxation area.
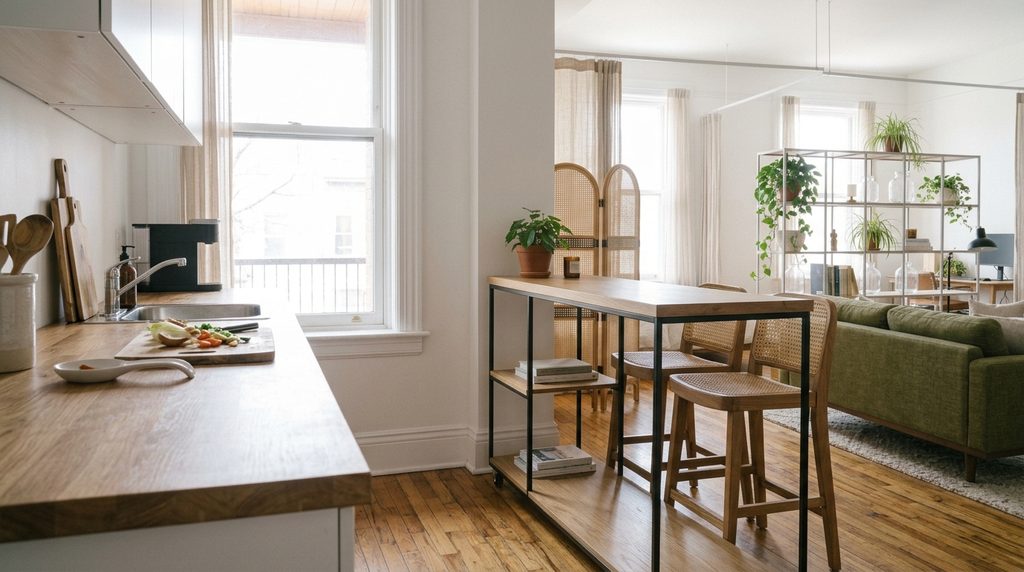
- The Rolling Island Hack: Place a narrow, rolling kitchen island or bar-height console table perpendicular to your kitchen counter. It instantly creates a defined kitchen perimeter, adds extra prep surface, and doubles as an informal breakfast bar with a couple of low-profile stools tucked underneath.
- Visual Division: The elevated surface acts as an eye-level divider, keeping your living room sofa focused away from sinks and appliances.
Summary & Practical Takeaways
Mastering a small open-concept layout doesn’t require a single sheet of drywall or a complex renovation. By relying on visual boundaries, smart furniture placement, and layered lighting, you can carve out dedicated spaces for every part of your daily routine.
The 3 Rules of Open-Concept Balance
- Keep Top Sightlines Clear: Avoid heavy, solid dividers that reach all the way from floor to ceiling across the center of your room. Keep upper sightlines open so light can reach every corner.
- Define Clear Pathways: Leave 6 to 12 inches of bare floor between area rugs and at least 30 inches of walking clearance around major furniture pieces to prevent a cramped feel.
- Maintain a Cohesive Color Palette: Choose a unified 3-color palette (e.g., warm wood tones, creamy neutrals, and soft sage accent accents) across all zones so the space feels like one intentional home rather than mismatched rooms glued together.
Quick Layout Diagnostic Checklist
Before moving your furniture around, ask yourself these three quick questions to pick your ideal zoning combo:
- Is privacy your biggest concern? Combine Trick 3 (Ceiling Curtains) with Trick 7 (Folding Screens) for maximum adaptability.
- Is your apartment feeling too flat or echoey? Focus on Trick 1 (Contrasting Rugs) and Trick 5 (Ceiling Lighting Zones) to add warmth and depth.
- Need more functional storage while dividing the room? Pair Trick 2 (Back-to-Back Furniture) with Trick 4 (Open-Back Bookcases).
With these simple, renter-friendly strategies, your open-concept studio or small apartment can finally deliver on its promise: an airy, light-filled space where every single square foot has a clear, beautiful purpose.
Frequently Asked Questions (FAQs)
How do I divide a small studio apartment without blocking natural light?
Use open-back shelving units, semi-sheer ceiling curtains, or woven rattan folding screens. These options obscure direct sightlines to private zones while allowing natural sunlight to pass freely across the entire floor plan.
Can you layer rugs in a small apartment without making it look messy?
Yes! The key is leaving a 6-to-12-inch gap of bare flooring between separate area rugs to create visual “walkways.” Keep the color palettes complementary so each rug clearly defines its own zone without clashing.
What is the best furniture placement to separate a living room from a bedroom in a studio?
Float your sofa so its back faces your bed frame. Adding a low console table directly behind the couch softens the transition, creates extra storage, and forms a physical half-wall between sleeping and lounging areas.