
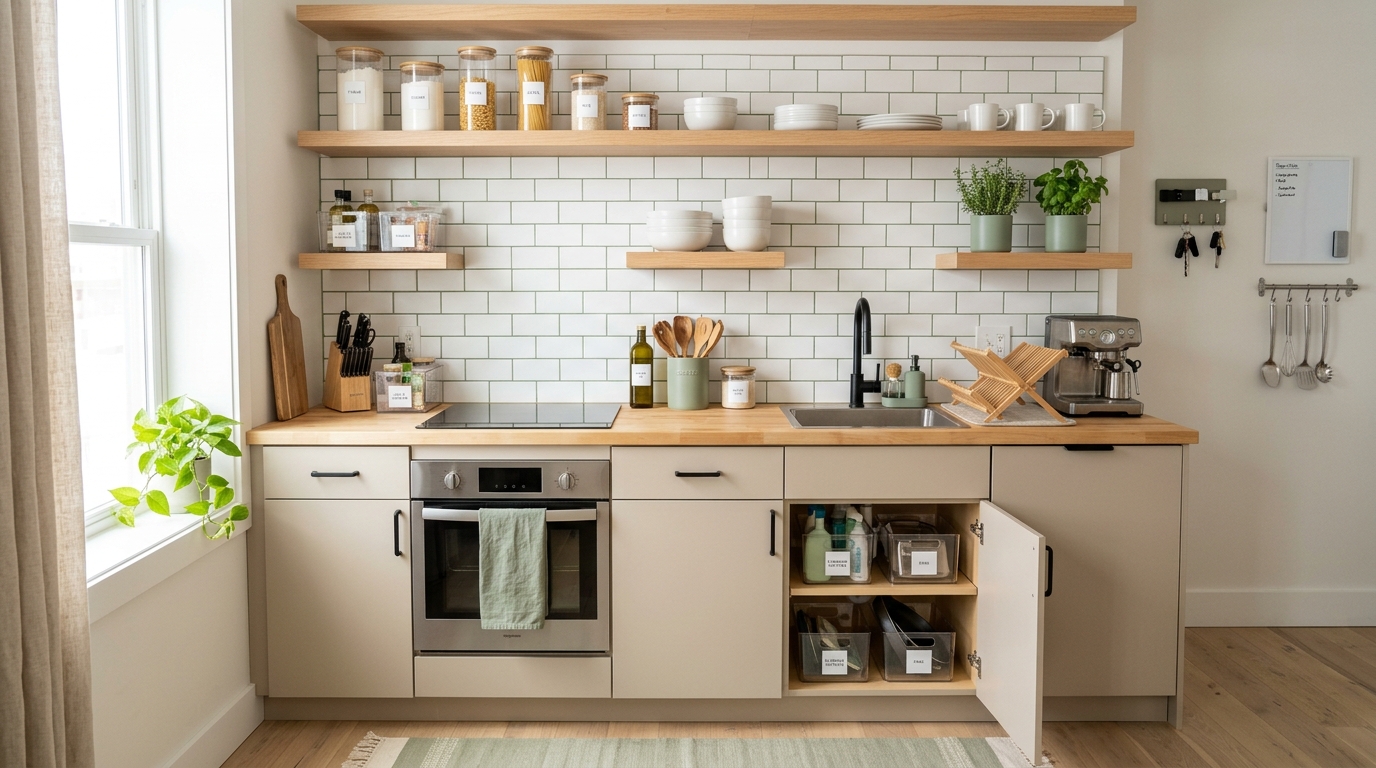
15 Genius Kitchen Storage Hacks for Tiny Apartments
You open a cabinet to grab a mixing bowl and three things fall out. The counter beside the stove is just wide enough for a cutting board, if you first move the toaster, the coffee maker, and the dish rack. Cooking a simple dinner feels like solving a puzzle.
If that sounds familiar, you’re in good company. Most small US apartment kitchens have the same problems: almost no counter space, shallow cabinets, and no pantry. Landlords rarely add storage, and as a renter you can’t knock down a wall or install custom cabinetry.
You don’t need to. Nearly every hack in this guide requires zero drilling. Everything uses adhesive hooks, tension rods, magnets, stackable bins, or freestanding pieces that come off cleanly when you move, so your security deposit stays safe.
Together, these 15 ideas work in three ways:
- Using vertical space (the inside of cabinet doors, the underside of shelves, the walls)
- Clearing the counters by relocating the things that don’t need to live there
- Containing the chaos so you can see everything you own at a glance
Let’s start with the cabinets and pantry, where the biggest gains usually hide.
Cabinet & Pantry Maximizers
Most kitchen cabinets waste a huge amount of air. A shelf might be 14 inches tall, but if you stack a single layer of plates on it, you’re using maybe 5 inches of that height. These first five hacks fix that.
Hack 1: Under-Shelf Wire Baskets
What it does: Adds a second storage layer inside a cabinet by hanging a basket from the underside of an existing shelf.
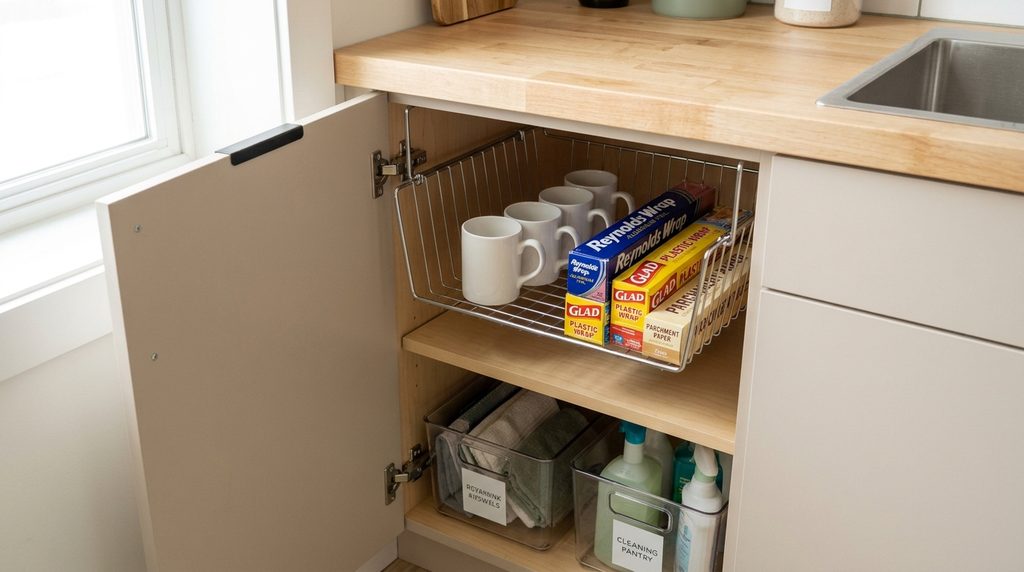
Under-shelf baskets are coated wire baskets that slide onto the edge of a shelf and hang below it. There’s no installation: you slip it on, and you’re done. They turn dead space into a drawer-like spot for:
- Mugs and teacups
- Plastic wrap, foil, and parchment boxes
- Small bags (tea, snack bars, seasoning packets)
- Dish towels
How to make it work:
- Measure the shelf thickness before buying. Most baskets fit shelves up to roughly an inch thick, but check the listing.
- Measure the clearance below the shelf so the basket doesn’t block the item sitting on the shelf underneath.
- Place it toward the front of the cabinet so you can reach into it without moving anything.
Best for: Cabinets where you have 8+ inches of vertical space between shelves.
Hack 2: Over-the-Cabinet Door Organizers
What it does: Turns the back of a cabinet door into a storage wall.
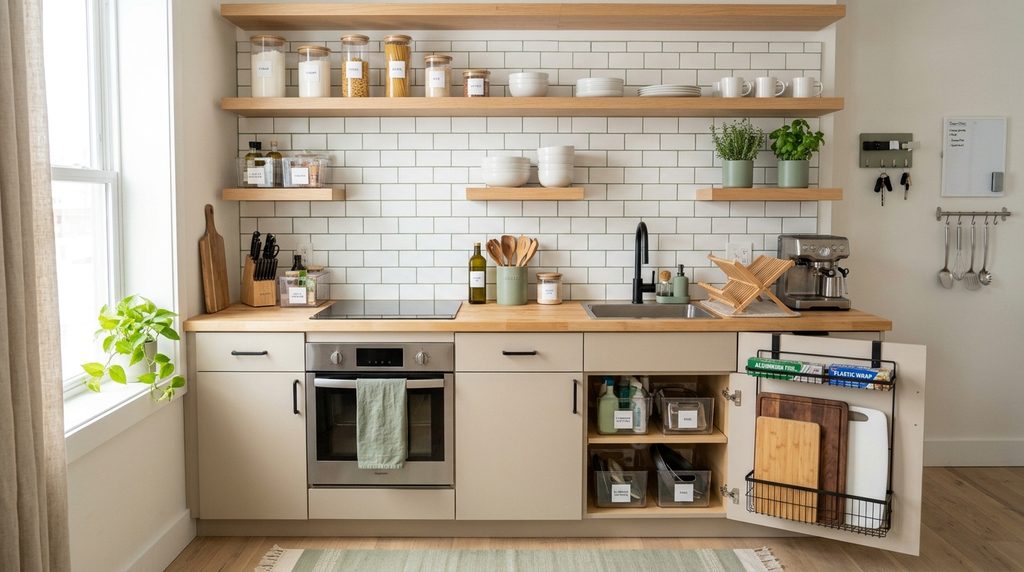
The inside of each cabinet door is prime real estate that most people ignore. An over-the-door organizer hooks over the top edge of the door, with no screws or adhesive. Common versions include:
- Wire racks and baskets for foil, plastic wrap, and sandwich bags
- Hanging rails for cutting boards, pot lids, and trivets
- Pocket-style holders for cleaning supplies, sponges, and dish soap
How to make it work:
- Check your door clearance. Close the door slowly with the organizer on. If it hits the shelf inside, you need a slimmer model.
- Use the lower cabinets for light items and the upper cabinets for flat, lightweight things like cutting boards, because heavy loads can strain hinges over time.
- Add a thin foam strip or felt pad on the edge of the organizer if you notice rattling.
Hack 3: Clear Stackable Acrylic Bins
What it does: Zones your pantry so every category has a “home” and you can see exactly what you have.
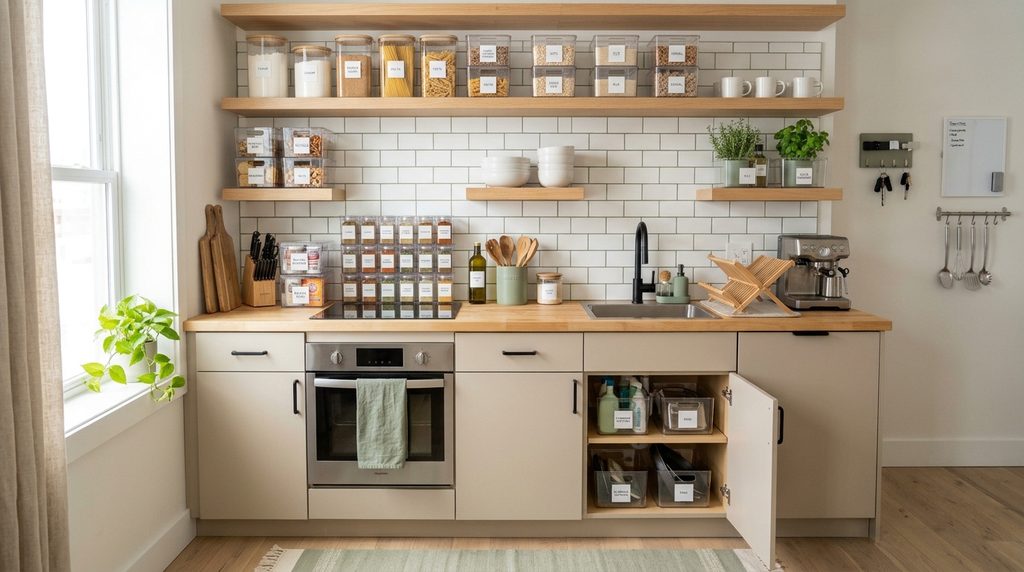
When a cabinet is a pile of loose packages, you buy duplicates because you can’t see what’s at the back. Clear, stackable bins fix this by grouping items into zones:
- Snacks: granola bars, chips, popcorn packets
- Baking: flour, sugar, baking powder, sprinkles, chocolate chips
- Breakfast: oatmeal, cereal, pancake mix
- Pasta and grains: rice, quinoa, noodles
- Packets: seasoning mixes, instant soups, sauces
How to make it work:
- Choose bins with open fronts or handles so you can pull them out like drawers.
- Label the front with a label maker, washi tape, or chalk labels so everyone in the household knows where things go.
- Decant dry goods (flour, sugar, rice, pasta) into airtight containers. They stack neatly and stay fresher, and you can see when you’re running low.
- Buy bins in one or two sizes so they stack together like building blocks.
Pro tip: Put the things you use daily in the front-most bin at eye level, and the occasional items (holiday baking supplies, specialty flours) up high or in the back.
Hack 4: Tiered Shelf Risers
What it does: Lets you see every spice, can, and jar at once, instead of digging through rows.
A tiered riser is a stepped shelf, like a small staircase, that raises the back row above the front row. It solves the classic “I know I have cumin somewhere” problem.
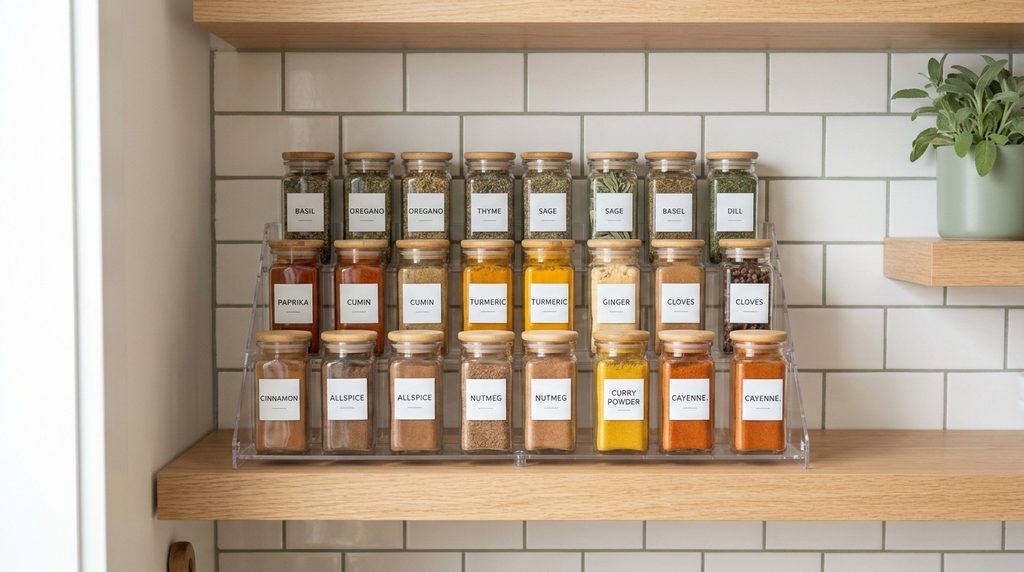
Where to use them:
- Spice cabinets: Every label is visible without moving a single jar.
- Canned goods: See the whole inventory in one glance.
- Sauce bottles and oils: Keep tall bottles in the back and short ones in front.
How to make it work:
- Expandable risers adjust to the width of your shelf, which helps in odd-sized apartment cabinets.
- Measure the shelf depth. Many apartment cabinets are shallow, so a compact riser is better than a deep one.
- Alphabetize spices or group them by cuisine (baking, Italian, Mexican, Indian). Pick a system and stick to it.
Hack 5: Tension Rod Divider Wall
What it does: Creates vertical slots for baking sheets, cutting boards, and trays, without a single screw.
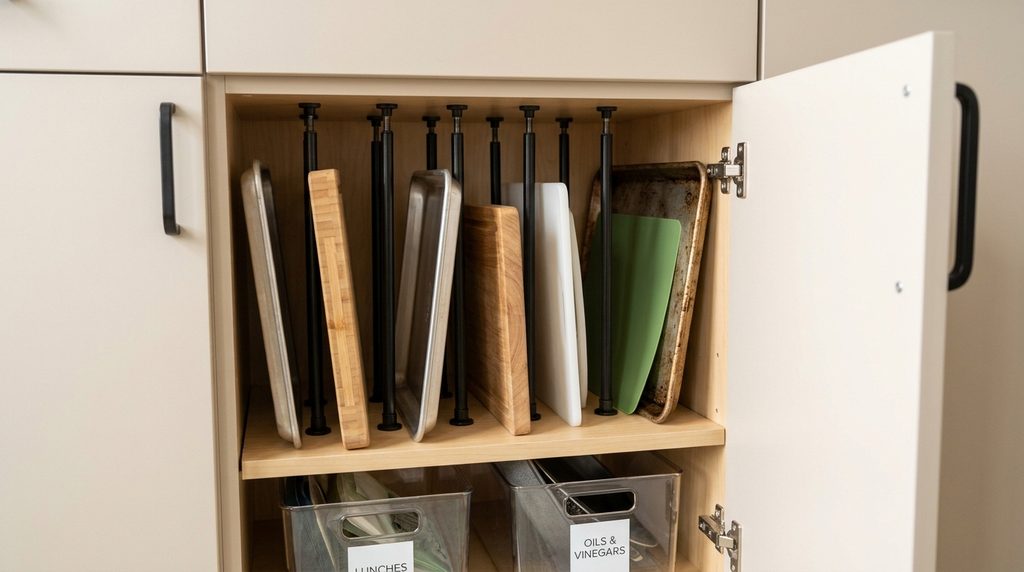
A tension rod holds itself in place by pressing outward against two walls. Install one or two vertically inside a cabinet (or horizontally under the sink) and you instantly get dividers.
Ways to use it:
- Vertical slots: Stand baking sheets, muffin tins, cooling racks, and cutting boards on their sides between rods, so you can slide out just the one you need instead of lifting a stack.
- Under-sink hanger: Install one horizontally and hang spray bottles by their triggers, so the floor of the cabinet is free for other items.
- Wrap and bag organizer: Hang rolls of foil or parchment from a rod in a small cabinet.
How to make it work:
- Choose a heavy-duty or “extra-strong” rod with rubber ends, and check the weight rating. Standard curtain tension rods may slip under load.
- Place the rods snugly and test with a light item before loading heavy trays.
- Use two rods stacked (one near the front, one near the back) for extra stability.
Counter & Vertical Wall Lifesavers
If the cabinets are full and the counters are still cluttered, it’s time to look up. The walls, the undersides of cabinets, and the narrow gaps beside the fridge all hold untapped storage.
Hack 6: Adhesive Magnetic Knife Strip
What it does: Frees up the counter space a knife block takes, and keeps knives within easy reach.
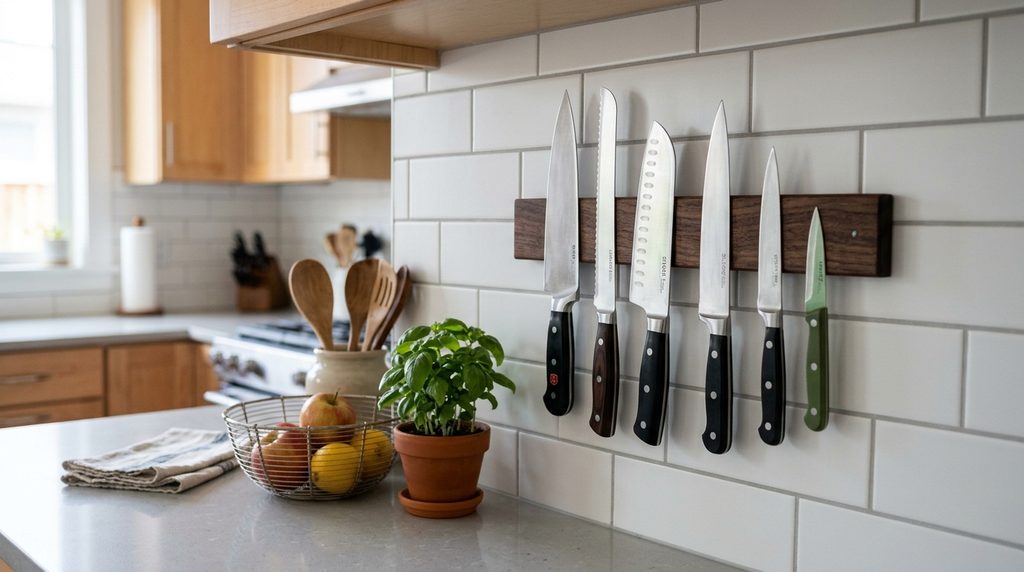
A knife block is bulky and often hogs 8 to 10 inches of prime counter. A magnetic strip mounts to the wall or the side of a cabinet and holds knives blade-side flat, so they’re visible and ready to use.
How to make it work:
- Choose an adhesive-mounted strip designed for renters. Pick one with a weight rating well above the combined weight of your knives.
- Clean the surface with rubbing alcohol before you stick it on, and let it cure as the package directs before hanging knives. This step is skipped by most people and causes most failures.
- Mount it away from the edge of the counter and out of reach of children.
- Place knives on carefully, spine first, so the blade edge doesn’t slam against the magnet and dull.
- Use it for more than knives: metal measuring cups, kitchen shears, and bottle openers also stick.
Safety note: If your walls are textured, tiled, or slightly greasy, adhesive may not hold a heavy set of knives. In that case, try the side of a cabinet or a smooth backsplash, or use a freestanding magnetic holder.
Hack 7: Under-Cabinet Stemware & Mug Hooks
What it does: Uses the empty space beneath upper cabinets for hanging storage.
There’s often 12 to 18 inches between the bottom of your upper cabinets and the counter, and most of it is wasted. Hooks and rails make it useful.
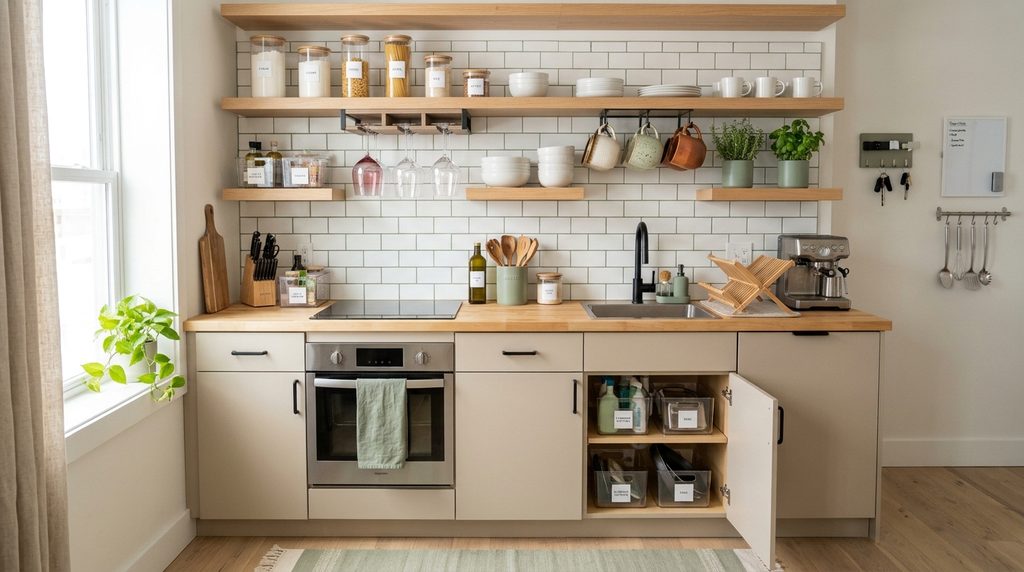
Options for renters:
- Stemware racks that slide onto the underside of a shelf or cabinet bottom, holding wine glasses by their stems
- Adhesive hooks for mugs, measuring cups, and small utensils
- Under-cabinet rails with S-hooks for hanging pots, ladles, or even a small dish towel
How to make it work:
- Mount hooks toward the front lip of the cabinet so mugs don’t bump into the wall.
- Check the weight limit on the hooks. Mugs are heavier than they look.
- Leave enough counter clearance so you can still reach in and don’t bang your head.
Bonus: A row of hanging mugs also makes your kitchen look more inviting.
Hack 8: Slim Rolling Utility Cart
What it does: Provides a movable “pantry” in a gap that fixed furniture can’t use.
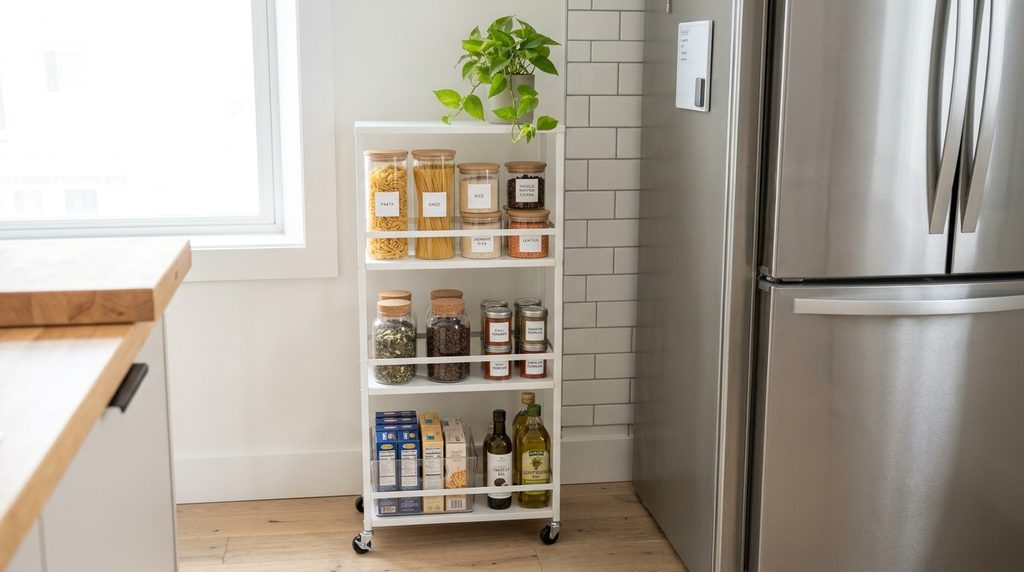
A narrow rolling cart, typically 6 to 10 inches wide with three or four tiers, slides into the gap beside the fridge, between the stove and the wall, or at the end of a counter. It’s perfect for:
- Canned goods and jars
- Oils, vinegars, and sauces
- Snacks
- Cleaning supplies
- Baking tools
How to make it work:
- Measure the gap first, including the width of the wheels. Leave a little wiggle room so the cart rolls out easily.
- Choose a cart with locking wheels if your floor is uneven.
- Keep it away from the stove, since heat and grease are hard on baskets and cans.
- Pull it out for cooking, then roll it back to hide it.
Moving day bonus: A rolling cart goes with you to the next apartment, and it works in a bathroom or laundry nook too.
Hack 9: Pegboard Wall Spice Rack
What it does: Puts your spices, tools, and small items on the wall instead of the counter.
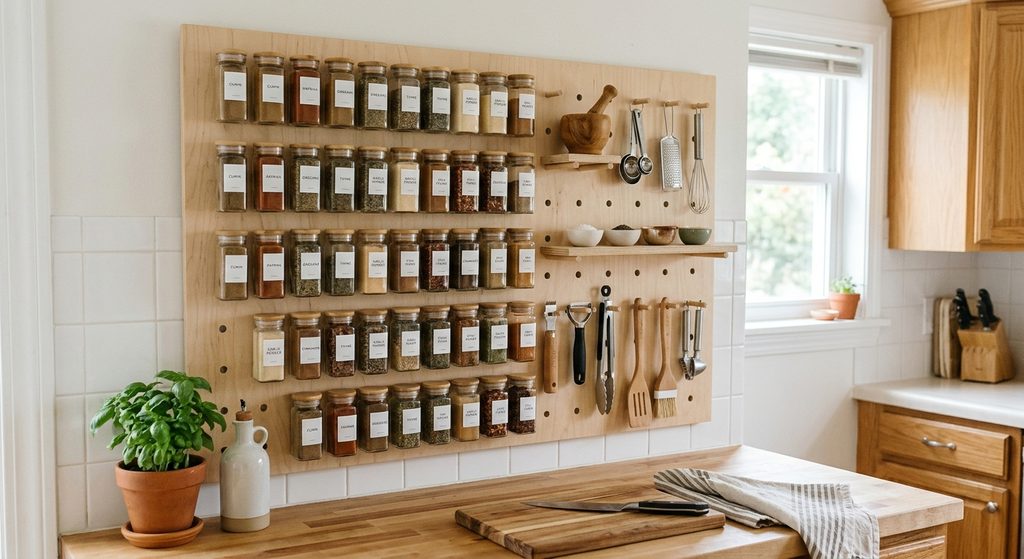
A pegboard is the ultimate flexible storage solution, because you can rearrange the hooks, shelves, and baskets any time. For renters, there are a few ways to do it without drilling:
- Freestanding or leaning pegboard panels, set on the counter or floor against a wall
- Pegboard panels attached with heavy-duty removable mounting strips, for lightweight loads only
- Over-the-door or over-the-cabinet pegboard systems that hang by hooks
What to hang:
- Small shelves or narrow ledges for spice jars
- Hooks for measuring spoons and cups
- Small baskets for sponges or tea bags
- Rails for lightweight utensils
How to make it work:
- Keep the loads light. Removable strips are strong, but they aren’t meant for heavy pans or cast iron.
- Mind the location. Don’t put it right next to the stove, where grease and heat will gunk it up.
- Paint it (before hanging) to match your kitchen. A white, black, or sage-green pegboard looks like a design choice, not a hardware-store project.
Hack 10: Foldable Over-the-Sink Drying Rack
What it does: Gives you an instant extra prep surface and clears the dish rack from your counter.
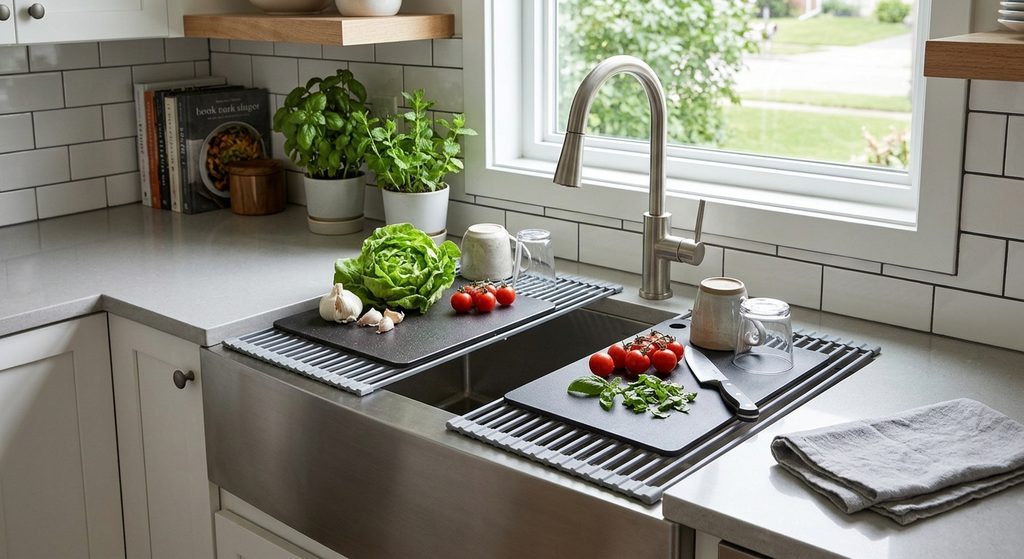
An over-the-sink rack sits across the sink basin, so dishes drain directly into the sink. That frees up the counter space where a standard dish rack lives. Many versions are roll-up styles that double as a surface:
- Roll-up drying racks (a silicone-coated or stainless steel grid) that can be rolled out over the sink for drying and rolled up when you’re finished
- Over-the-sink cutting boards or counter extenders that sit across the basin to create prep space
How to make it work:
- Measure the width of your sink (rim to rim) before buying. Sinks vary, and the rack has to span it.
- Check the weight capacity. A drying rack holds plates, while a prep board must hold produce and a knife.
- Dry it off and store it vertically (e.g., on a cabinet door hook) when it’s not in use.
Why it matters: In a tiny kitchen, gaining even one extra square foot of prep space is big. Use the sink as a bonus counter, as long as you aren’t using it for dishes at that moment.
Refrigerator & Deep Drawer Wizardry
These last five hacks tackle the awkward spots: the side of the fridge, deep corner cabinets, overcrowded drawers, and the cabinet door you hadn’t thought of.
Hack 11: Magnetic Refrigerator Spice Bins & Paper Towel Holders
What it does: Turns the sides of your fridge into storage.
If your fridge has a side wall exposed (not tucked flush into cabinetry), it’s free real estate.
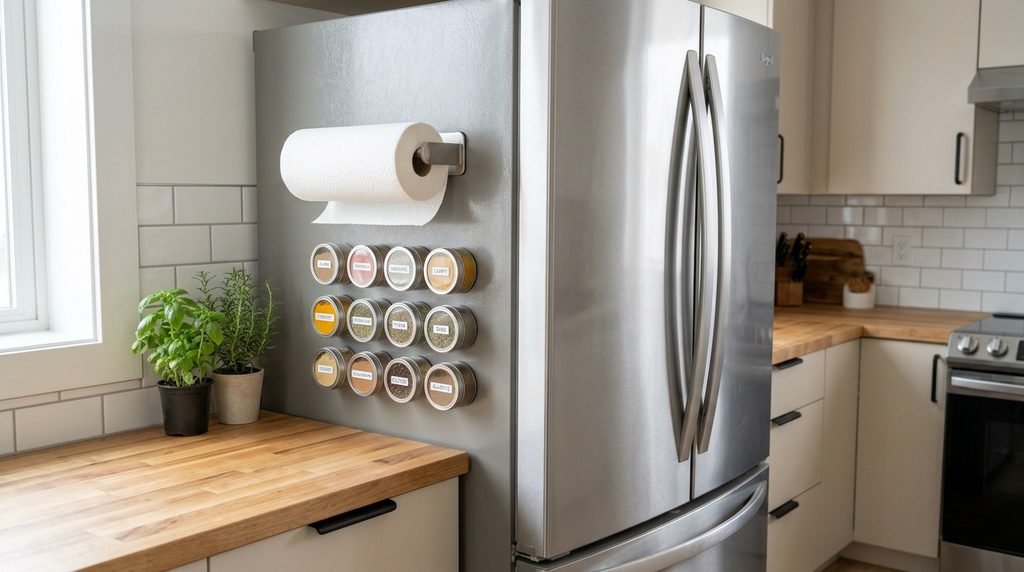
What to hang:
- Magnetic spice tins or shelves for your most-used seasonings
- A magnetic paper towel holder to free up the counter
- Magnetic hooks for oven mitts, towels, or bags
- Magnetic baskets for foil, wrap, or small tools
How to make it work:
- Test your fridge with a magnet first. Some stainless steel and newer finishes are not magnetic, so confirm before you buy.
- Mind the weight. Magnets slide on smooth surfaces when overloaded, so keep spice tins light and use strong magnets.
- Leave the fridge door vents clear and don’t block any handles or airflow areas.
Note: If you can’t use magnets, an over-the-side hook or a slim shelf that hangs on the fridge top works too.
Hack 12: Lazy Susans in Deep Corner Cabinets
What it does: Ends the “black hole” problem, where items vanish into the back of a corner cabinet.
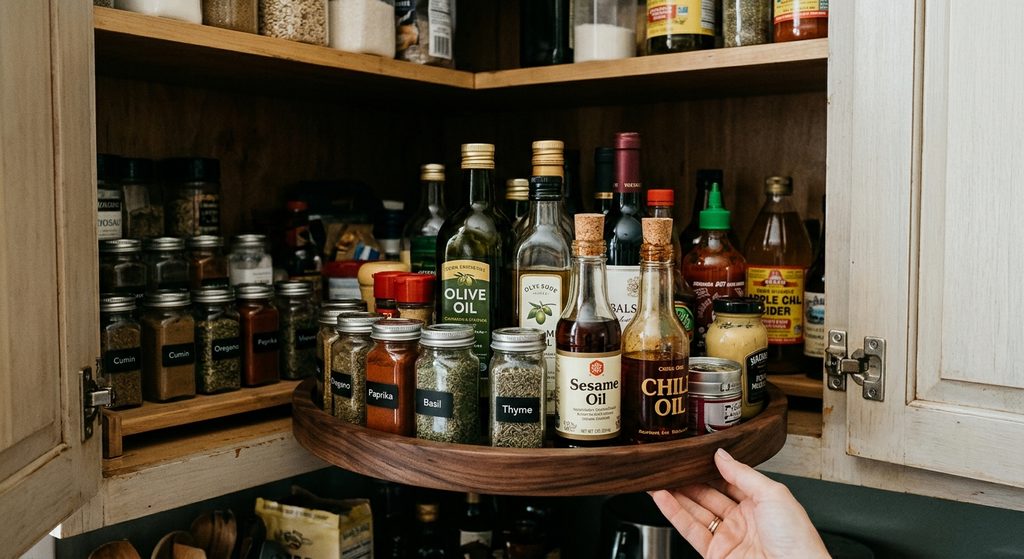
Deep corner cabinets are notorious for swallowing things. A lazy Susan (a rotating tray) lets you spin the contents toward you instead of reaching in and knocking things over.
Great uses:
- Pantry corners: oils, vinegars, jars, sauces
- Under-the-sink cabinets: cleaning supplies
- Fridge shelves: a small one for condiments or leftovers, where you can spin to find the mustard
How to make it work:
- Choose a lazy Susan with a lip or raised edge, so bottles don’t slide off while spinning.
- Pick the right size. A tray that’s slightly smaller than the cabinet width spins freely without catching the door frame.
- Consider a two-tier model if you have the height.
Hack 13: Drawer Dividers & Utensil Trays
What it does: Stops the junk-drawer avalanche, and makes small drawers work for you.
In a small kitchen, every drawer counts. Unorganized drawers waste space because things slide together and you can’t stack or group anything.
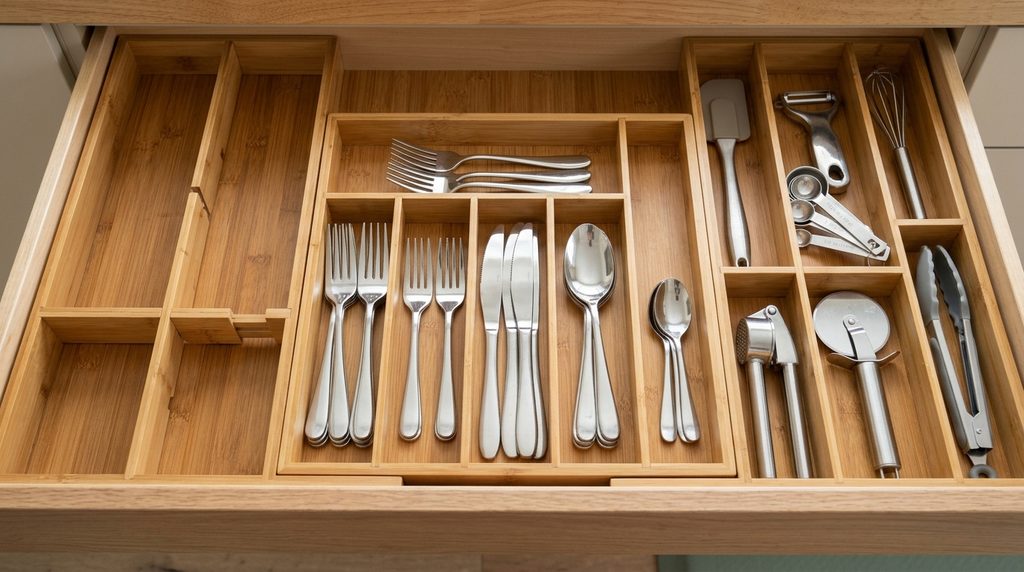
Solutions:
- Expandable bamboo or plastic utensil trays that adjust to fit the width of your drawer
- Adjustable drawer dividers (spring-loaded or tension dividers) that you can customize
- Small drawer bins for gadgets, rubber bands, chip clips, and take-out chopsticks
How to make it work:
- Measure the drawer’s interior (width, depth, and height) before buying.
- Group by function: cooking utensils together, baking tools together, “every-day” cutlery separate.
- Do a purge first. If you have three spatulas that you never use, donate them, and you’ll free up even more room.
- Use non-slip shelf liner under the tray so nothing shifts when you open and close the drawer.
Hack 14: Tiered Can Dispensers
What it does: Organizes soda and canned goods in a first-in, first-out system.
Cans roll around, get buried, and expire in the back of a cabinet. A can dispenser stores them on a slight slope, so when you pull one from the front, the next one rolls forward.
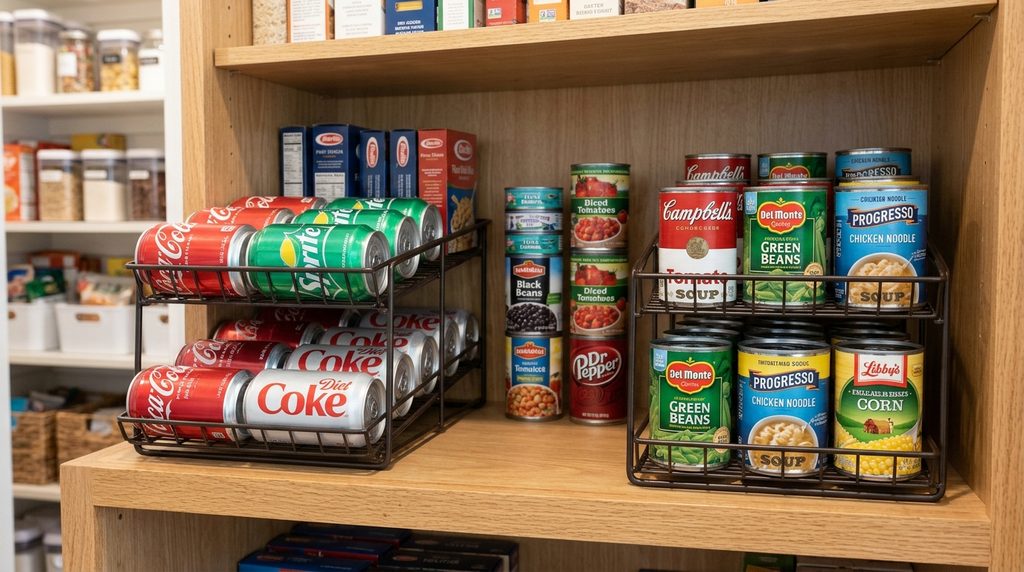
Where to use them:
- Pantry shelves or cabinets for canned vegetables, beans, and soups
- The fridge for soda, seltzer, or beer cans
- A closet or shelf for bulk-bought cans
How to make it work:
- Match the dispenser to your can size. Standard soup cans, soda cans, and tall cans differ.
- Rotate stock: load new cans at the top or back so the oldest get used first.
- Check the expiration dates when you load it, which is also a good moment to clear out what’s expired.
Hack 15: Command Hook Pot Lid Holders (Inside Cabinet Doors)
What it does: Gets pot lids off the shelf, and stops the clanging avalanche every time you open the cabinet.
Pot lids are awkward: they don’t stack well, take up shelf space, and rarely stay put. Mounting a few hooks inside a cabinet door gives each lid a hanging spot.
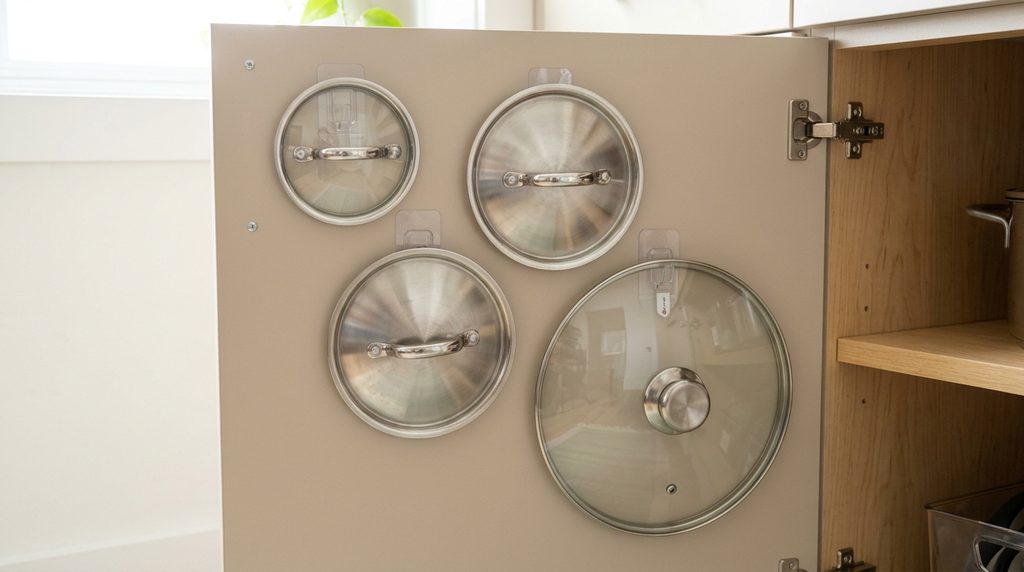
How to do it (zero drilling):
- Use adhesive removable hooks (such as Command-style hooks) on the inside of the cabinet door.
- Hang each lid by its handle, or use a small adhesive rail with S-hooks.
- Alternatively, use an adhesive lid rack designed for cabinet doors.
How to make it work:
- Weigh your lids. Glass lids are heavier than metal ones, so check the weight rating on the hooks and use more than one if needed.
- Clean and dry the door before applying, and follow the wait-time instructions on the package.
- Check that the lids won’t hit the shelf when you close the door.
- Use the same trick for other items: oven mitts, measuring spoons, and cleaning cloths.
Quick Reference: Which Hack Solves Which Problem?
| Your Problem | Try These Hacks |
|---|---|
| Cabinets are full, but I have vertical space | #1 Under-shelf baskets, #4 Tiered risers |
| Counters are cluttered | #6 Knife strip, #10 Over-sink rack, #11 Fridge storage |
| I can’t find anything in the pantry | #3 Clear bins, #12 Lazy Susan, #14 Can dispenser |
| Baking sheets and boards are a mess | #5 Tension rod dividers, #2 Door organizer |
| No pantry at all | #8 Slim rolling cart, #9 Pegboard |
| Drawers are chaotic | #13 Drawer dividers |
| Pot lids everywhere | #15 Lid hooks |
Summary & Practical Takeaways
A tiny kitchen doesn’t have to feel chaotic. You’ve just seen 15 ways to claim back space without drilling, painting, or risking your deposit. If you’re not sure where to start, remember these three rules.
The 3 Rules for Small Kitchens
1. Go vertical.
Think about height instead of floor space. Use the undersides of shelves, the inside of cabinet doors, the walls, and the sides of the fridge. Everything that’s flat on a counter is a candidate to hang, stack, or mount.
2. Keep the counters clear.
Counters are for doing, not storing. Give each item a home somewhere else, and keep only the daily essentials (like a coffee maker) out. A clear counter makes the whole kitchen feel bigger and gives you room to actually cook.
3. Contain everything in clear bins.
Group like with like, and use clear containers so you can see what you have. Label them, and you’ll never buy a fourth jar of paprika again.
Where to Start
You don’t have to do all 15 in a weekend. Try this order:
- Declutter first. Take everything out of one cabinet, toss expired food, and donate duplicates. It’s much easier to organize less stuff.
- Measure twice. Write down your cabinet, drawer, and gap dimensions before you shop, because most “it didn’t fit” returns come from skipping this.
- Start with your biggest annoyance. If it’s the counter, start with a knife strip or over-sink rack. If it’s the pantry, start with bins and risers.
- Do one zone at a time. A single organized cabinet will motivate you to keep going.
Before You Move Out
Because all of these hacks are renter-friendly, you can take them to your next place. For adhesive items, remove them gently: slowly stretch the adhesive strip straight down along the wall (never pull it outward) so it comes off without damaging paint.
A small kitchen can still be an efficient, enjoyable space. With just a few of these hacks, you may find yourself with room for a cutting board, a clear counter, and a kitchen that finally works for you.
Which hack are you trying first? Tell us in the comments, and share your before-and-after photos!
Frequently Asked Questions
What’s the best first hack for a tiny kitchen?
Under-shelf baskets and clear stackable bins give the biggest gain for the least effort and cost, since they use space you already have.
Will adhesive hooks damage my walls or cabinets?
Used correctly, they usually don’t. Clean the surface, follow the cure time, stay under the weight limit, and remove them by stretching the strip slowly. Test on a hidden spot if you’re unsure about older or textured paint.
How do I add storage if I have no pantry at all?
Combine a slim rolling cart (Hack 8), clear bins on a cabinet shelf (Hack 3), and an over-the-door organizer (Hack 2) to make a “pantry” out of three small pieces.
Are these hacks safe for knives, glass, and heavy items?
Check the weight rating of every adhesive product, and use mechanical solutions (tension rods, hanging baskets, freestanding carts) for anything heavy.